gvSIG Mobile is a software developed in Java
to display and manage geographic information in
mobile devices (hereafter PDA). This document presents the installation process
of gvSIG Mobile and a gvSIG Desktop extension to
export projects to gvSIG Mobile.
gvSIG will be named gvSIG Desktop in this document in order to differentiate with
gvSIG for mobile devices.
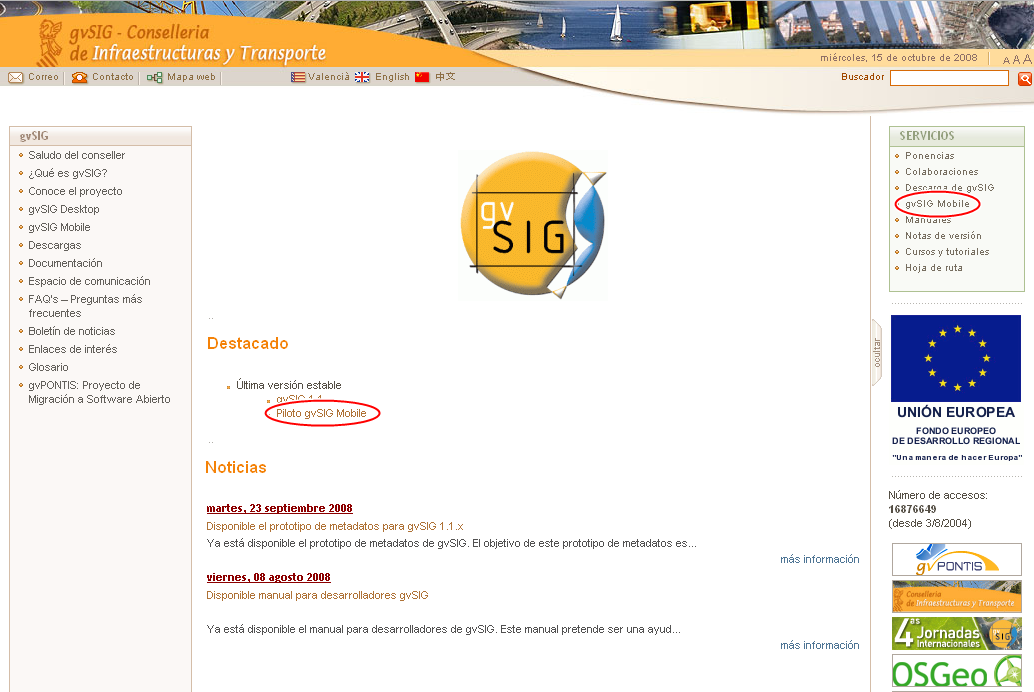
To download gvSIG Mobile Installer, please go to the gvSIG web site.
http://www.gvsig.gva.es/index.php
Next is a picture about how the site looks like.
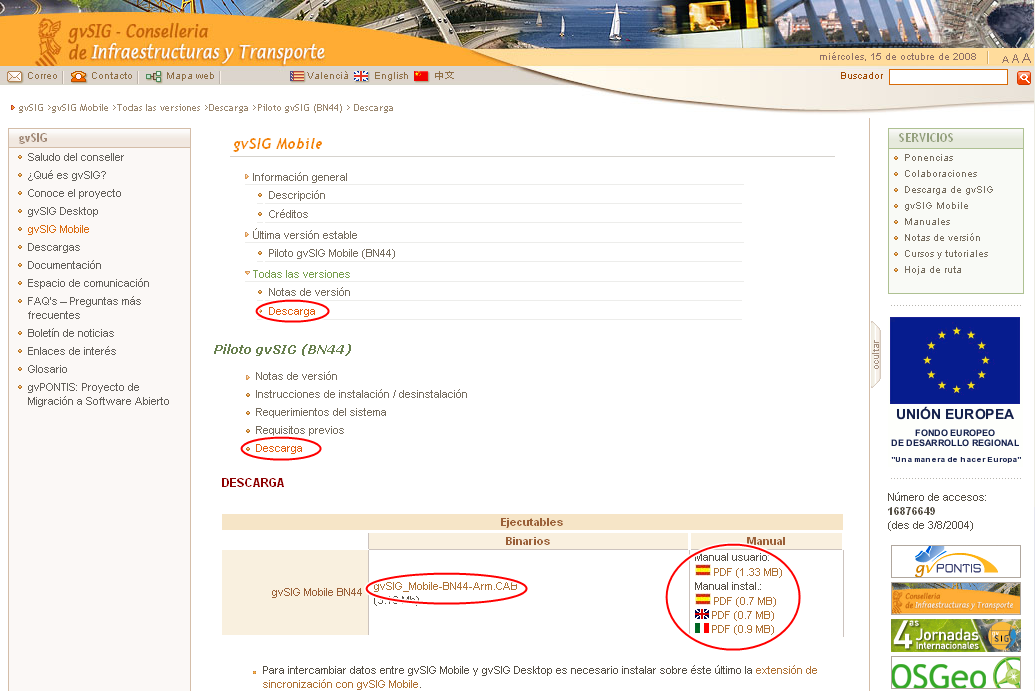
Next step is to access gvSIG Mobile section, and to look for the installer (see next point).
It's also recommended to download the application manuals (even this one). There are download links in the same web site.
On the download website, can see several installers. You must select one of them in accordance with your device.
Next, you can see the installer names:
gvSIGMobile-0.2b-build_213-WM2003-Arm-withPhoneMe.CAB where:
- 0.2a means the software version.
- build 213 it's the build number.
- WM2003-Arm Tell us which Operating System is it made for.
- withPhoneMe If the PhoneMe JVM is included with the installer.
gvSIG Mobile runs on Java J2ME CDC Personal Profile JVM. It have been tested using IBM WEME (J9) and PhoneMe Advanced.
Note:
PhoneMe advanced is under development, It is NOT recommended use it on production systems because it has stability problems.
Note:
IBM WEME (J9) it's a Java Virtual Machine licensed by IBM , if you are interested on use it, you must get in contact with IBM.
Those are the present available alpha version 0.2 (pilot 2) installers:
- gvSIGMobile-0.2a-build_261-WM2003-Arm-withPhoneMe.CAB
- gvSIGMobile-0.2a-build_261-WM5-Arm-withPhoneMe.CAB
- gvSIGMobile-0.2a-build_261-WMX-forJ9.CAB
- gvSIGMobile-0.2a-build_261.zip
Next, each installer content are explained, if after read it you have any doubts about which one choose, please install gvSIGMobile-0.2a-build_261-WM2003-Arm-withPhoneMe.CAB.
Installs gvSIG Mobile and the PhoneME Advanced JVM on Windows Mobile 2003 based devices. It includes the Java Virtual Machine, and you don't need another software to use gvSIG Mobile.
Installs gvSIG Mobile and the PhoneME Advanced JVM on Windows Mobile 5 and Windows Mobile 6 based devices. It includes the Java Virtual Machine, and you don't need another software to use gvSIG Mobile.
Installs gvSIG Mobile on Windows Mobile based devices. This file includes a executable file which look for the PhoneME Advanced Jave Virtual Machine on the root PDA device path and on the root path on the memory card to get easier the application launcher. To use this installer you must to have installed the PhoneME Advanced JVM on the device previously.
Installs gvSIG Mobile on Windows Mobile based devices. This file includes a executable file which look for the J9 Jave Virtual Machine on the root PDA device path and on the root path from memory card to get easier the application launcher. To use this installer you must to have installed J9 JVM on the device previously.
Includes the gvSIG Mobile files without installer only. This version is to use gvSIG Mobile under other Operating Systems or with another JVM. To run the application you have to be able call his own JVM, passing the right parameters. It's only expert user's recommended.
The present chapter explains how to install gvSIG Mobile.
gvSIG Mobile Requires a Java Virtual Machine (VM) to run.
gvSIG Mobile have been tested on IBM's J9 and SUN's PhoneME Advanced.
There are three different installers:
- gvSIG Mobile with PhoneMe included. Includes gvSIG Mobile and PhoneME VM. It's the easiest and quickest option.
- gvSIG Mobile J9 compatible. gvSIG Mobile version for J9 VM.
- gvSIG Mobile PhoneMe compatible. gvSIG Mobile version for PhoneME VM.
If you want to use an installer without included VM, you will have to install it separately.
NOTE:
- If installed VM and gvSIG Mobile installer don't match, strange behaviours may happen.
First Step: Copy installer to the PDA Device
Next, the new downloaded installer must be copied to the PDA memory.
There is different ways to do that depending on the OS. On the following pictures the installation it's done from Windows XP with ActiveSync 4.5 and WM 5.
Second Step: Install gvSIG Mobile into PDA
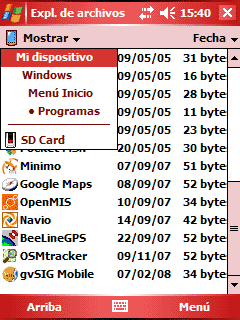
To start the installation, use the PDA File Explorer and navigate to the place where the gvSIG_Mobile_with_PhoneMe.BNxx.Arm.CAB installer was copied. Now click on it.
In there is a secondary storage (SD expansion memory, etc..), the installation process ask if we want to install it on the Device, or the secondary memory. You can choose both but installation on the PDA root is recommended.
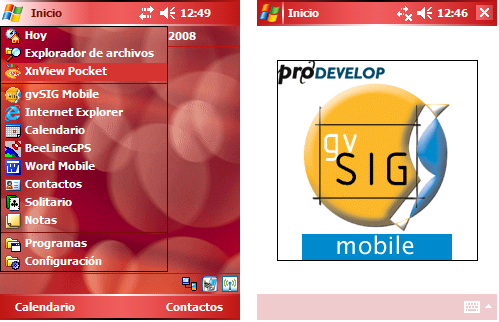
gvSIG Mobile and PhoneMe will be installed and a new gvSIG Mobile link will be created on the programs menu.
Now just tab on gvSIG Mobile.exe to run the application
There is a log file that logs the launch
process and shows the potential errors. This file is in the installation folder and is named gvsig_mobile_launch.log.
Currently, gvSIG Mobile run correctly on J9 virtual machine developed by IBM. Previous gvSIG Mobile pilot version, which runs only with this virtual machine exclusively, was be able to download the JVM from the IBM web.
Unfortunately, the download link isn't available anymore, thought the compatibility with the IBM JVM is maintained, isn't possible shows a installation process to follow in this manual. If you've got an installation of this JVM, you don't need download and install anyone, even if you are thinking about get this IBM JVM, gvSIG Mobile is compatible.
Once JVM IBM J9 is installed on the device, following the next steps to finish the installation of gvSIG Mobile IBM J9 version.
Download from the gvSIG web, if it wasn't done before, in the previous step, the gvSIG installer IBM J9 compatible.
- gvSIG_Mobile_to_J9.BNxx.Arm.CAB Download it to obtain the right behavior to J9
To conclude the gvSIG Mobile install, follow the Second and Third previous chapter steps.
Nowadays, the PhoneMe Advanced project is the new Sun JVM for mobile devices in developing process. This JVM is developed by Hinkmond Wong y Davy Preuveneers. In the gvSIG Mobile project, it have been working closer with Davy Preuveneers, who develop the JVM CDC with Personal Profile.
Unlike of J9, the IBM JVM, PhoneMe has GPL license and it's free distributed. This new JVM, can be installed separately from gvSIG Mobile, although it's distributed one gvSIG Mobile installer which includes the PhoneMe virtual machine.
The separately installation option, allows update the JVM as new versions are coming out, without having to uninstall gvSIG Mobile.
On the other hand, the gvSIG Mobile with the included PhoneMe JVM installation, guarantees the installation of the JVM version tested by the gvSIG Mobile developers.
The gvSIG Mobile aplication uses PhoneMe CDC with Personal Profile, it's possible uses this JVM on PDA's and SmartPhones with Windows Mobile Operating Systems (henceforth OS).
NOTE:
- The gvSIG Mobile compatibility with the several Windows Mobile (henceforth WM) versions starts from WM 5.
- For WM 6 versions the correct software working depends on the JVM developing for the SO to a great extent.
- The SO WM CE and WM 2003 versions, now older and limited, have some unavailable capabilities, some others couldn't be 100% correct performance, so it isn't assured, the compatibility to these SO.
- New compatibilities with another SO will be added, like Android from Google compatibility for instance, and also more limited versions for CLDC in common mobile devices.
If it's made the decision of install the PhoneMe JVM separately from gvSIG Mobile installation, next there are some details about the steps to download and install on the device.
First Step: Download the JVM
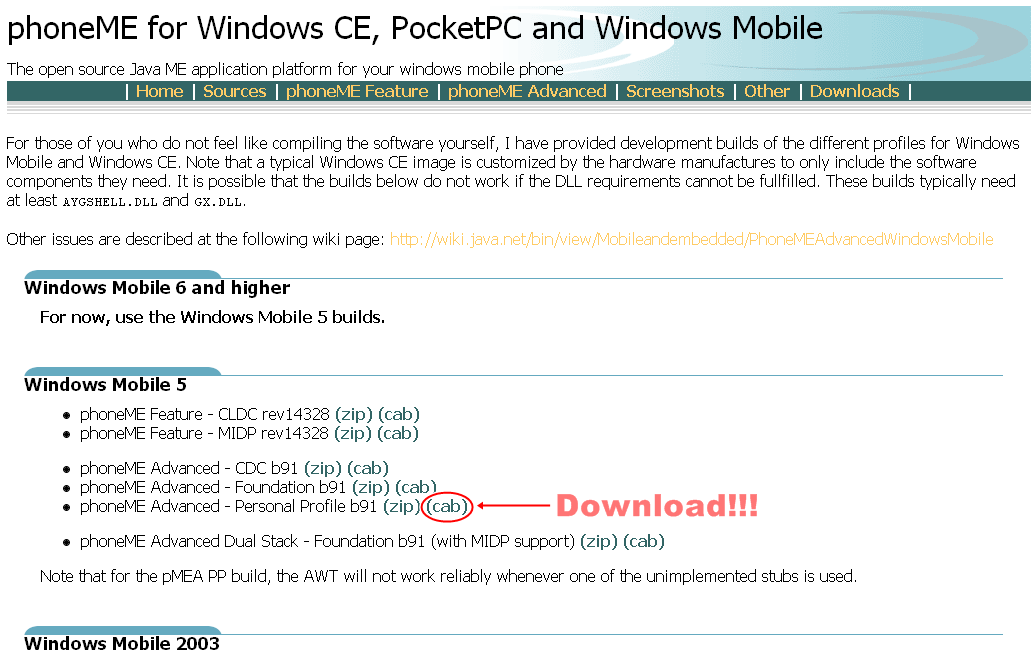
PhoneMe has a web to download the CAB file installers for Windows Mobile. The web offers several JVM supporting different Operating Systems and performances. Have to select the correct installer for the device OS where the application will be installed. For gvSIG Mobile are allowed the JVM since the WM2003 generated for.
Furthermore, there are differences between several JVM, based on the device and performance. To be able to execute gvSIG Mobile is needed the PhoneMe CDC with Personal Profile JVM, one of the most performance to mobile devices.
Select the correct JVM and download it.
Go to Davy's Web site to do that:
http://www.cs.kuleuven.be/~davy/phoneme/downloads.htm
The web looks like the next picture showed.
Second Step: Syncrhonize with PDA Device
Next, the new downloaded installer must be copied to the PDA memory.
There is a manner to do that from PC through the PDA depending on the used OS. On the following pictures the installation it's done from Windows XP with ActiveSync 4.5 to WM 5.
Third Step: Install JVM on the PDA
To Begin the installation, search on the PDA File Explorer, the place where the CAB installer was copied, and run it.
In the case of some memory extern device is available (SD expansion memory, etc..), the installation process ask us about if is wanted to install on the Device, or the secondary memory instead of it, to save device main memory.
Automatically, the JVM is installed at the device, making a new folder named phoneme and now allows running the JVM.
Once JVM SUN PhoneMe is installed on the device, following the next steps to finish the installation of gvSIG Mobile PhoneMe version.
Download from the gvSIG web, if it wasn't done before, in the previous step, the gvSIG installer PhoneMe compatible.
- gvSIG_Mobile_to_PhoneMe.BNxx.Arm.CAB Download it to obtain the right behavior to PhoneMe
To conclude the gvSIG Mobile install, follow the Second and Third steps from the Quick gvSIG Mobile Install chapter.
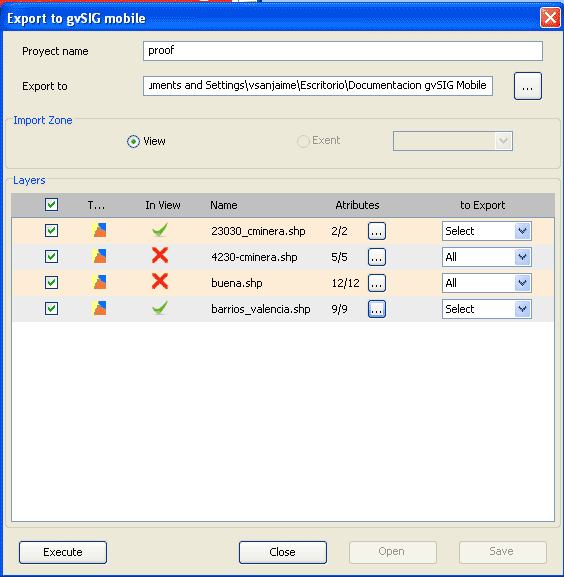
The pilot is complemented with an extension to gvSIG Desktop which
allows the user to export vector and raster data from a gvSIG Desktop view into a folder,
ready to be sent to the PDA.
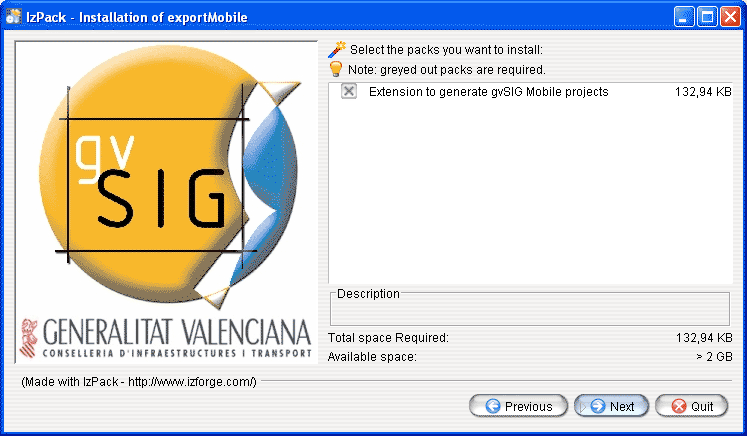
The installation process is similar to any other
extension of gvSIG Desktop. Using an easy multiplatform
installer, the extension is added to an installation of
gvSIG Desktop.
This extension is compatible with gvSIG 1.1 and later revisions.
