


6. Visual Interface
6.1. Abeille
We use Abeille to create visual interfaces. On this program we can stablish windows aspect, names, ec. Using FormPanel library we can easily load on a script,
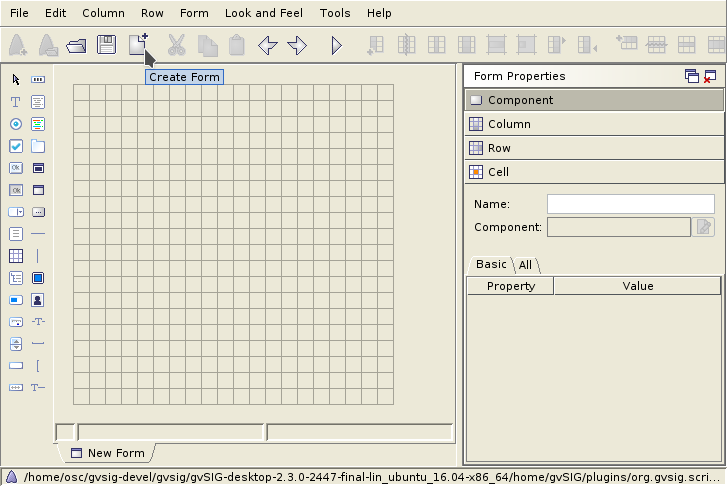
We opened the Abeille from the button | abeille | located on the Scripting Composer toolbar.
Note
Remember, if you want to see Abeille toolbar, we must instal ScriptingComposerTools we could download from the complement administrator.
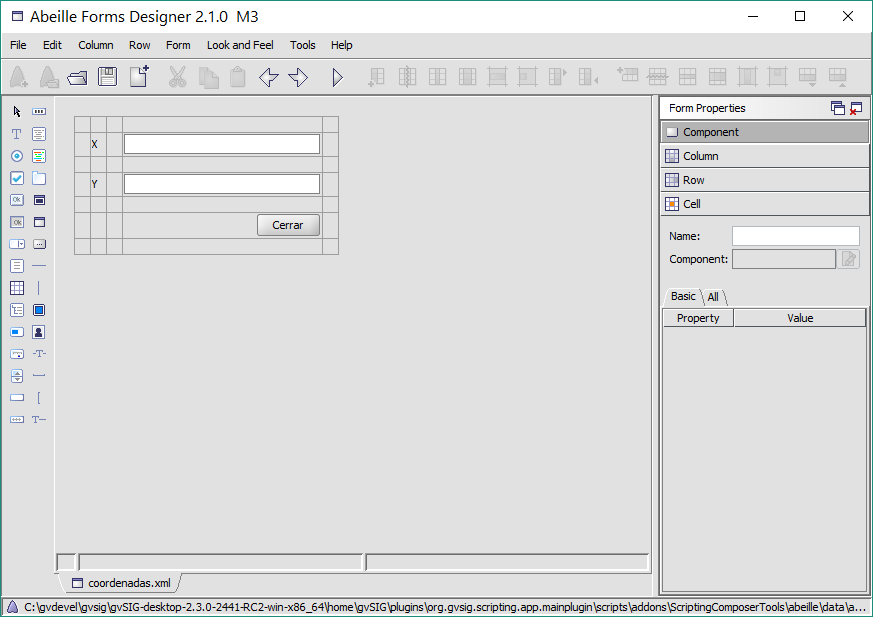
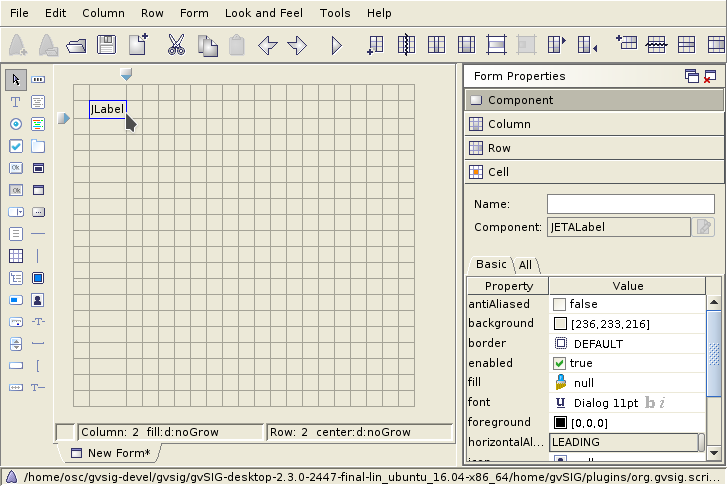
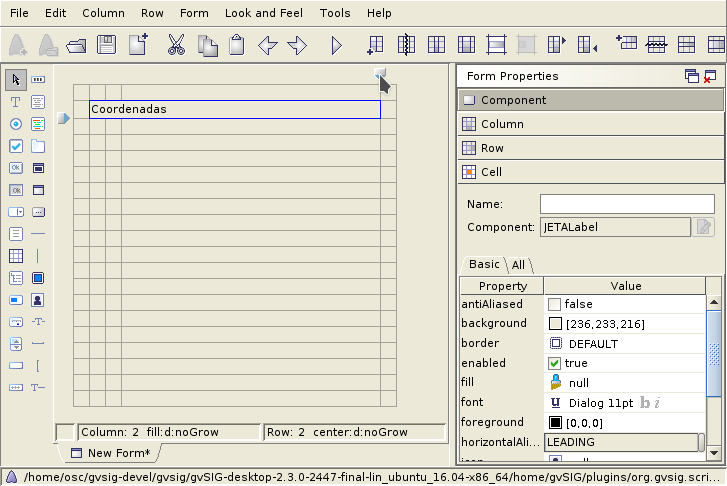
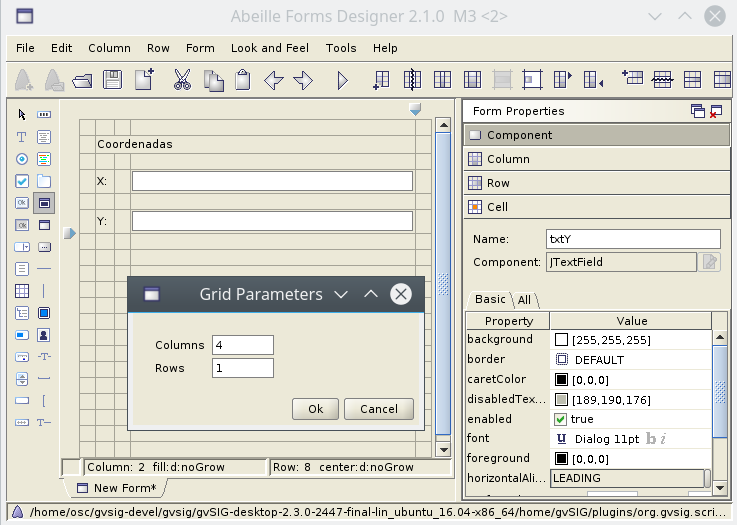
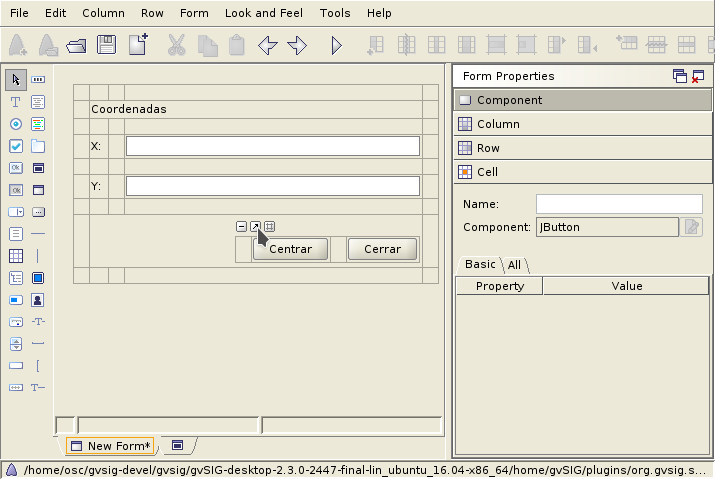
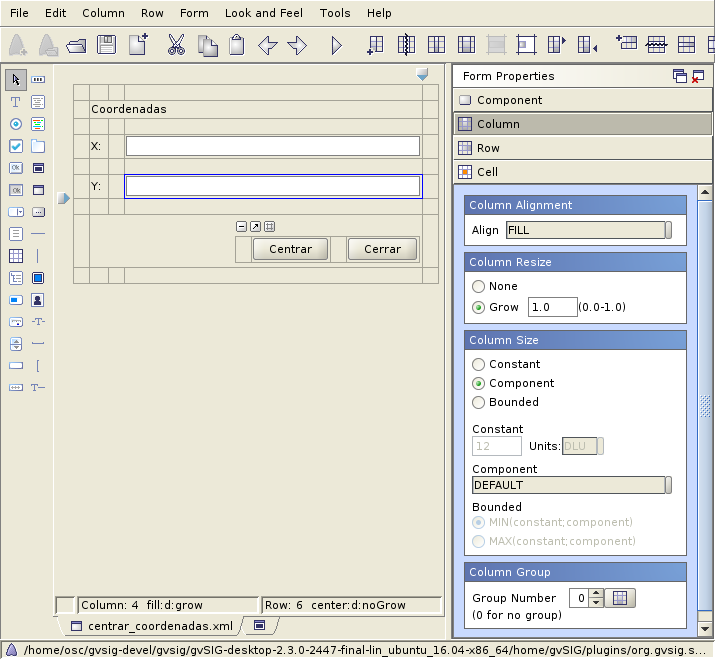
The Abeille program appears in the image with the example coordenadas.xml:
6.2. Use example
Download the example explained below: CentrarCoordenadas
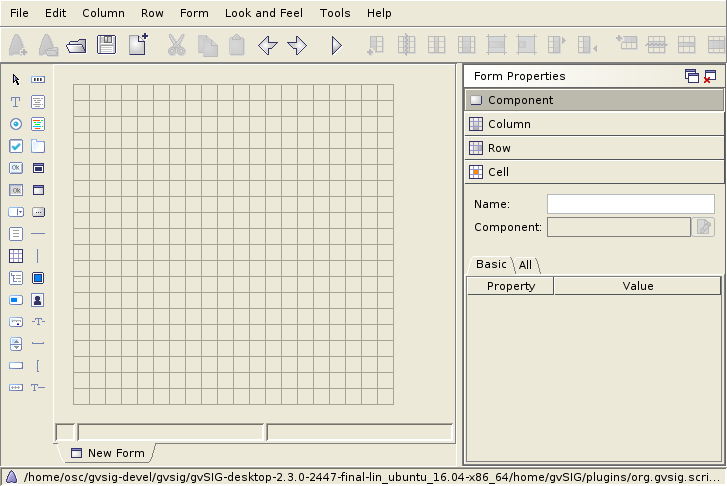
To create a visual interface we create a new form on Abeille.
We create a new label label.
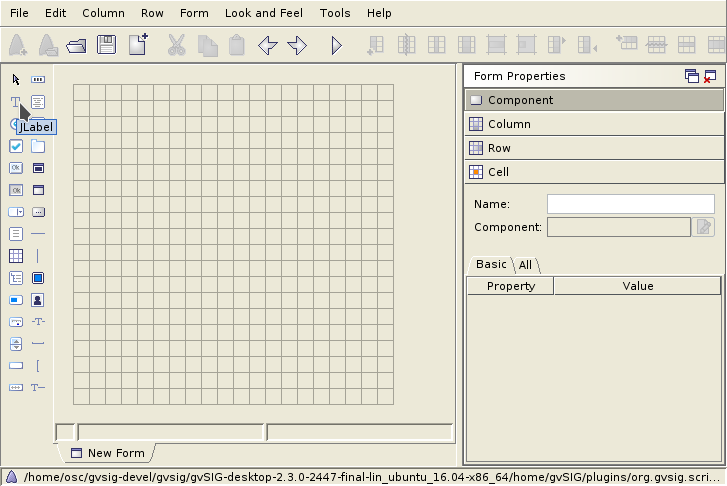
We pressed the place where we want it on the grid.
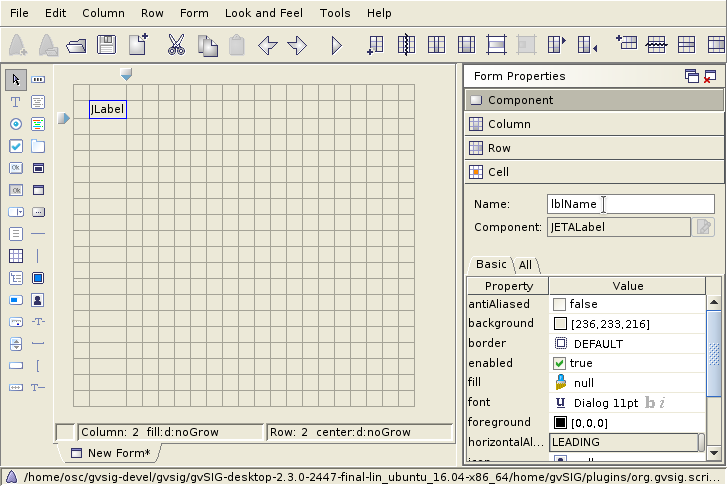
Now we can name the label. With this name we will acces the component from our script. In this case, we name it lblName.
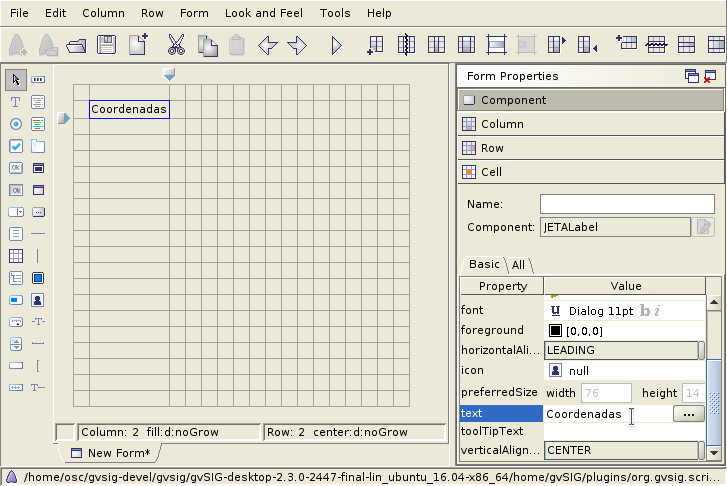
We change the text will contain this laber to: Coordinates
You can extend the box range on the form to fit better the interface we are going to create.In this case we want it covering 3 columns of the grid, leaving a column on each side so the components we’re creating are not together on the edge of the window.
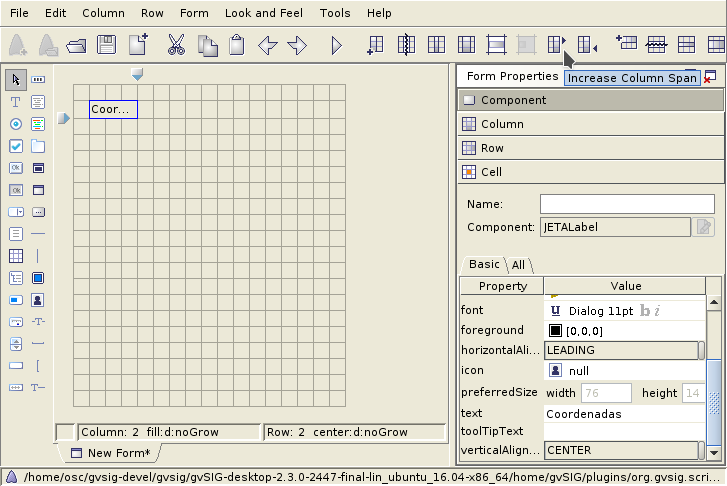
We see the rank of the coordinate label was extended. On this script interface we use 5 columns, 3 to situate the components but the others to separate the edges.Now we can remove those columns we are not going to use with “Delete Columns”.

We will expand the width of some columns form for better viewing, but by the end we will explain some other options to do this automatically and assure proper viewing. Thus, we only have to press on the column to modify and displace the sign appearing on the top right.
We repeat the proces to create two new labels named lblX & lblY, with text “X: “ e “Y: “ respectively. We leave one row between each of them for better visualize:
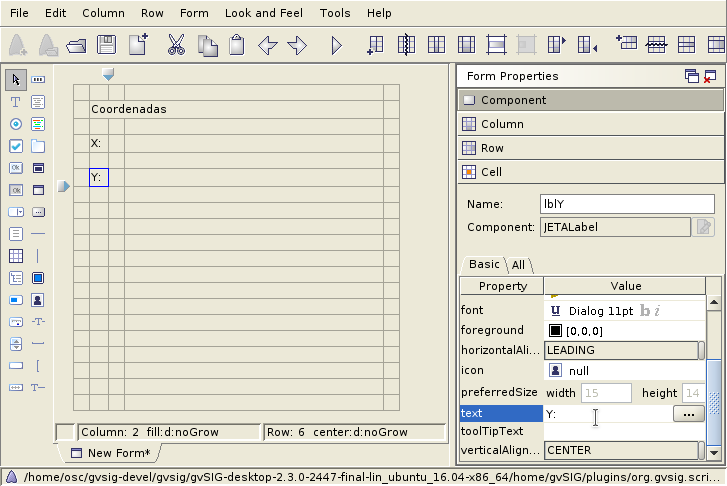
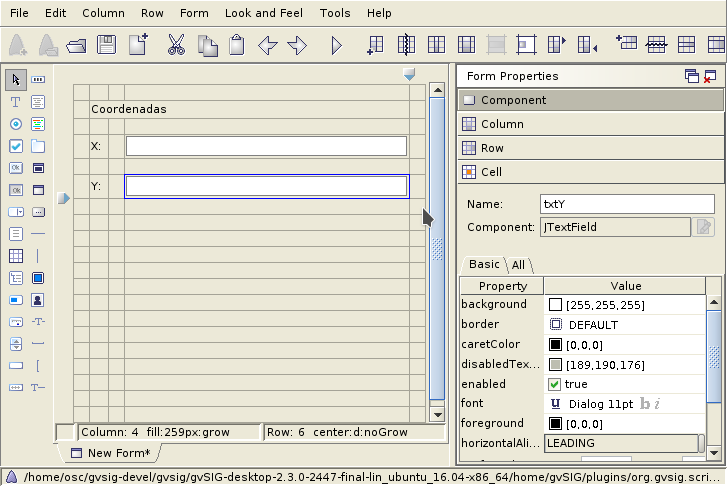
Now we create a text field`. This field allow us show values and introduce them:
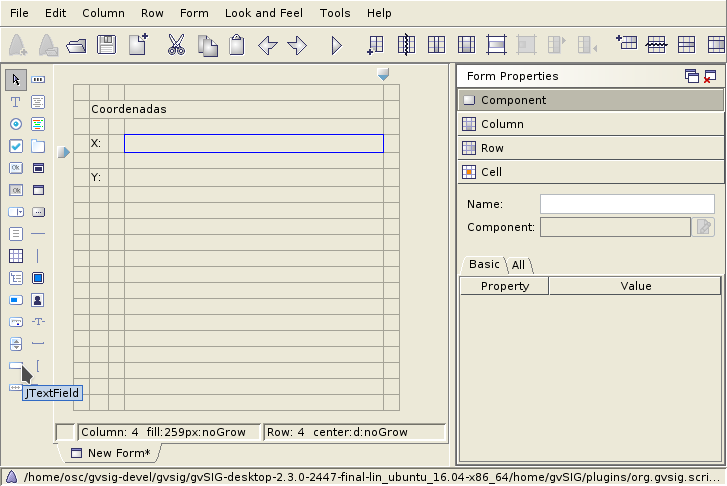
We repeat the previous proces to create two text fields named txtX y txtY.
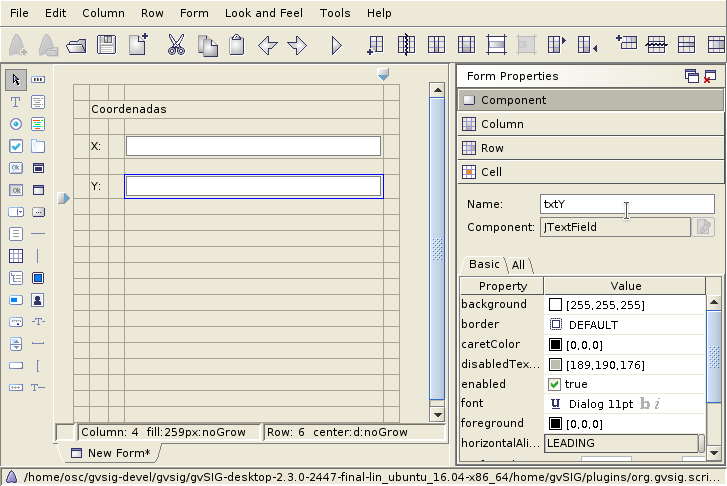
To the column where the text box is situated, we will give it the expansion possibility needed, e.g, if the user expand the window. This option help to hold correctly viewing the interface, and give us the option detailing the components we allow resize.
To do this, we will select some column celd who contain the component text box, we will go to up menu: menuselection:Column –> Resize: Grow.
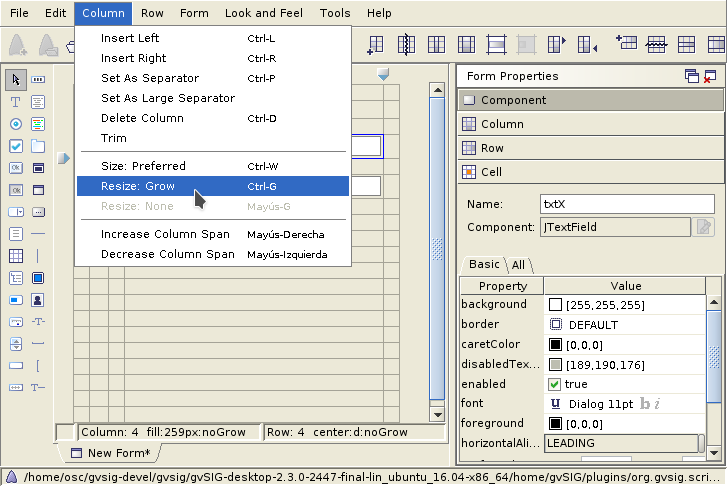
We see how the previewing of the form has changed, being resize useing the designated column.
The following step was create spaces for the aplication buttons, in this case, will be two. The first button do the action Center:btnCenter, the next do the action Close: btnClose.
In order to get more freedom on the position and size configuration for the buttons, we will do it as below.
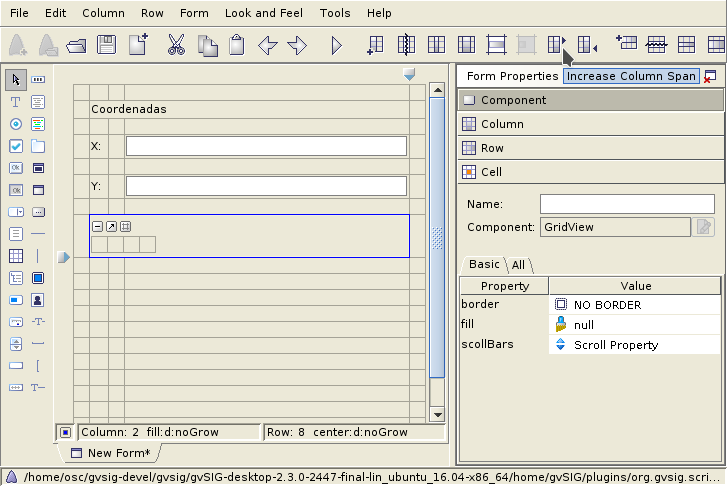
First we will create a component “Embedded Form”. this option allows insert a form inside another.
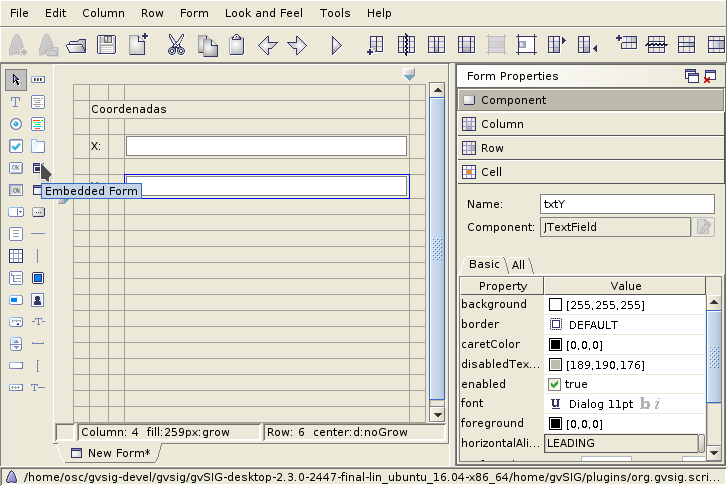
We situate the new component down the last label, leaving a separating row:
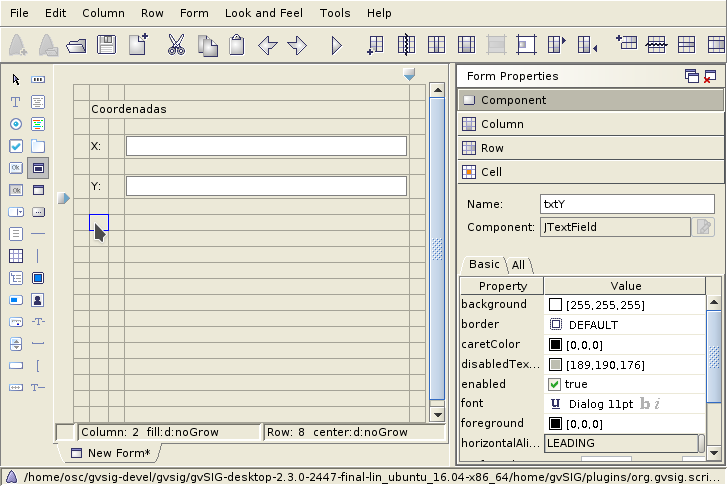
Appear a window indicating the form size we want insert, we indicate 4 columns and 1 row. Then we have space to situate the buttons and leave separating betwen them.
Giving a result like:

Once insert, we will indicate ocuppy the two following columns, as we have done with the first coordinate label, using Increse Column Span.
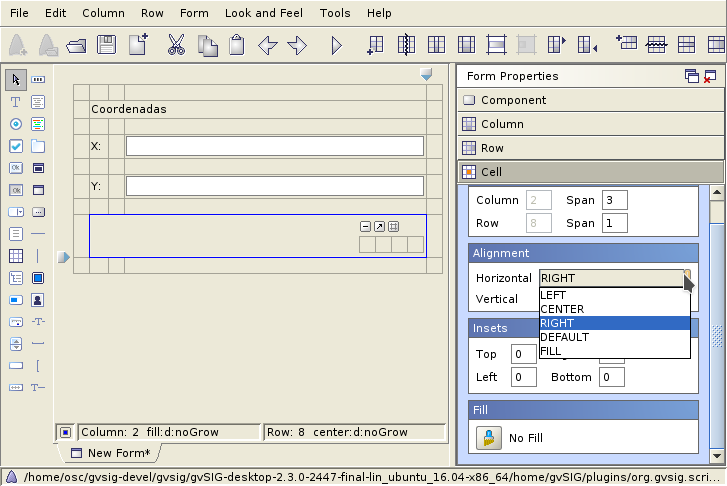
Leaving a separating row for bottom edge, we can eliminate surplus rows. The result will be like:

We will indicate to the subform will aligned on right of cell who contain it. We push on this cell on the right , leaving the follow result:
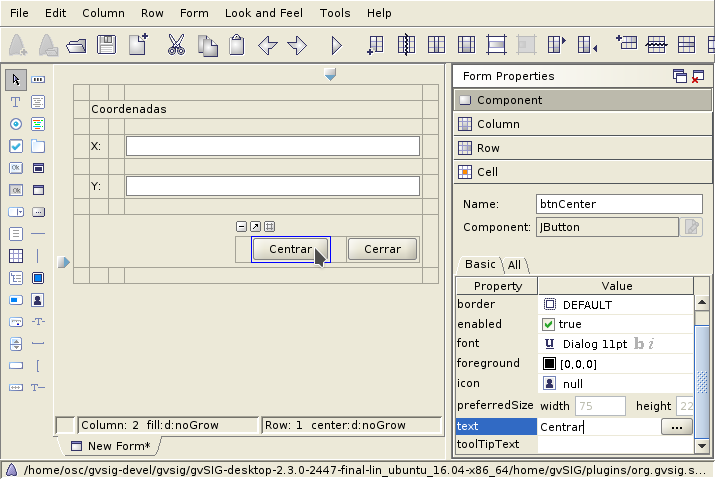
Now we can create buttons on this subform, btnCenter & btnClose. We select the option jButton:

Then we place those two buttons inside the subform:
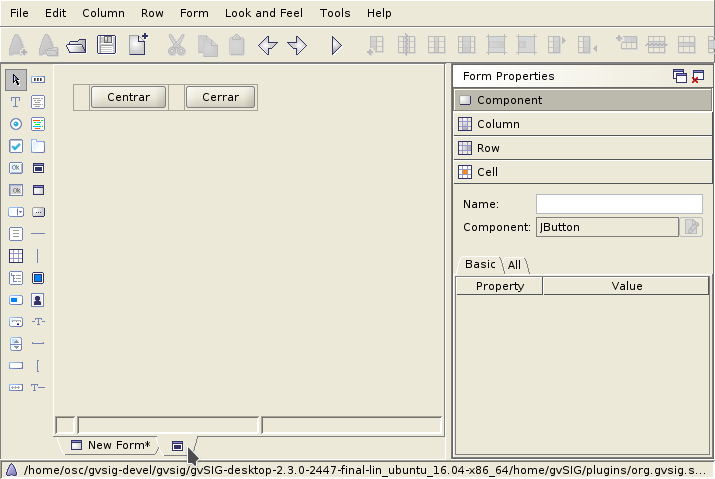
If we face a more complicated case, there is a option to extend this subform :
The form appears in a diferent tab:
Now we will already have made the interface, only we will have to save on the script’s directory with the extension .xml:
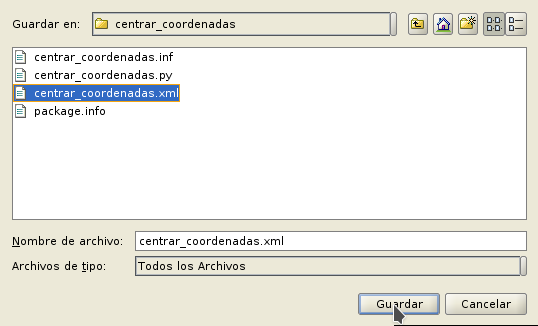
At any times we can make changes on the interface by open the file .xml from Abeille.
Here we see how the program respond to diferent sizes:
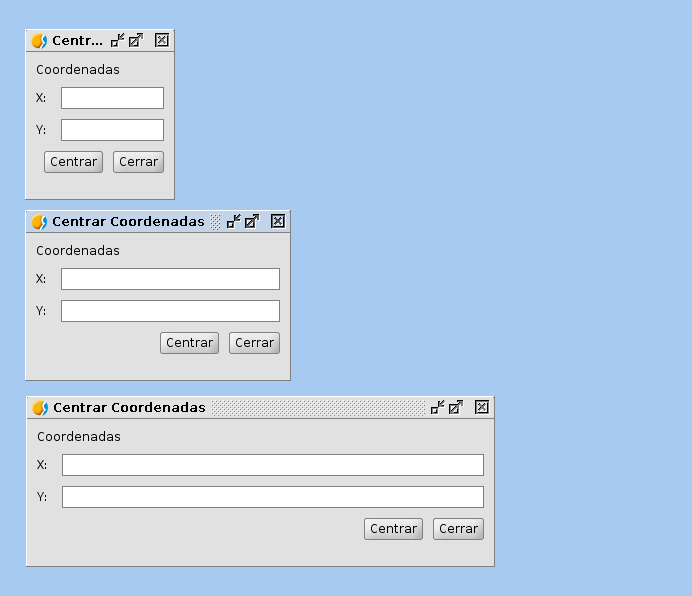
From the code we can stablish the window size we want with the line self.setPreferredSize(300,300), thus we see some like below:
from gvsig import * from gvsig.libs.formpanel import FormPanel
- class Panel(FormPanel):
- def __init__(self):
FormPanel.__init__(self, os.path.join(os.path.dirname(__file__), “ui_basic.xml”)) self.setPreferredSize(300,300)
- def main(*args):
l = Panel() l.showTool(“Visual”) pass
We also have many more options that allow us to configure in detail the react of our interface components, such as menu options Column:
6.3. FormPanel use
For creating visual scripts we will rely in the FormPanel class contained on gvsig.libs.formpanel. We will create a new class containing our script functionality and will extend from FormPanel.
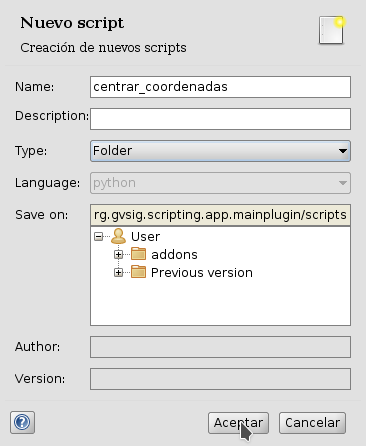
First we are going to create a new folder so we put our example into it.
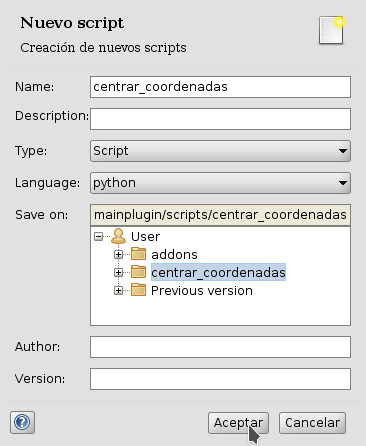
Then, we create a script on this folder named center_coordinates.py
We will save the form explained above on this folder.
Loading an interface form script:
from gvsig import *
from gvsig.libs.formpanel import FormPanel
import os

class Panel(FormPanel):
    def __init__(self):
        FormPanel.__init__(self, os.path.join(os.path.dirname(__file__), "ui_basic.xml"))

def main(*args):
    l = Panel()
    l.showTool("Visual")
    pass
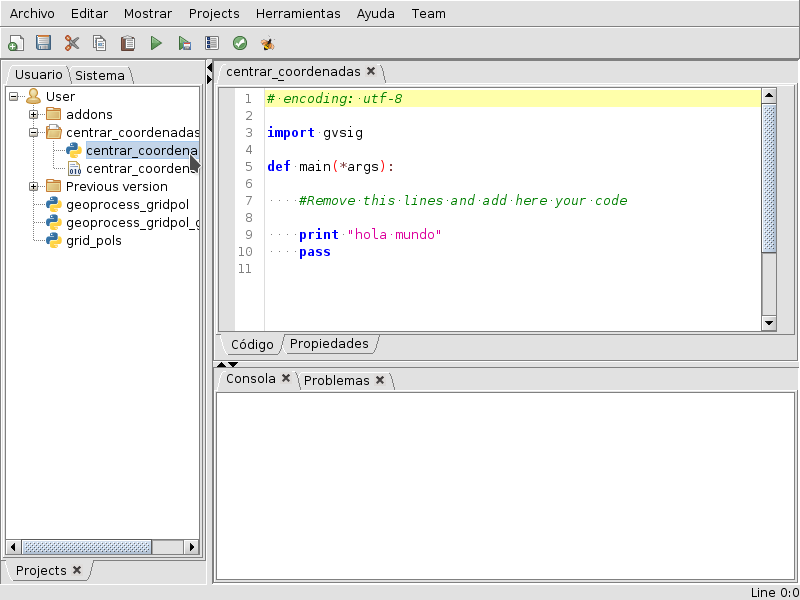
Based on this template we create our new script center_coordinates.py.
By default, FormPanel has stablished a method btnClose_click, which will be use to close the script. Thus we only have to establish on Abeille a button called `` btnClose`` and we will have scheduled a closing button for the app.
We have our module ready to be programmed. We have a folder containing the script and the interface to use.
We continue developing the FormPanel functionalities. One of them is the auto link with events occurring on the visual interface elements. E.g. if we have a button named btnCenter and we want this react when we press on it, we just create a method in our class that contains the name of the element “btnCenter” finished with the event we want to capture “_CLICK”.
By this way we have no needs to worry about the events, the FormPanel library manages these events:
# encoding: utf-8

from gvsig import *
from gvsig.libs.formpanel import FormPanel
import os

class CenterCoordinates(FormPanel):
    def __init__(self):
        FormPanel.__init__(self,
                            os.path.join(os.path.dirname(__file__),
                                        "center_coordinates.xml")
                            )

    def btnCenter_click(self, *args):
        print "Clicked!"

    def btnClose_click(self,*args):
        self.hide()

def main(*args):
    l = CenterCoordinates()
    l.showTool("Center Coordinates")
    pass
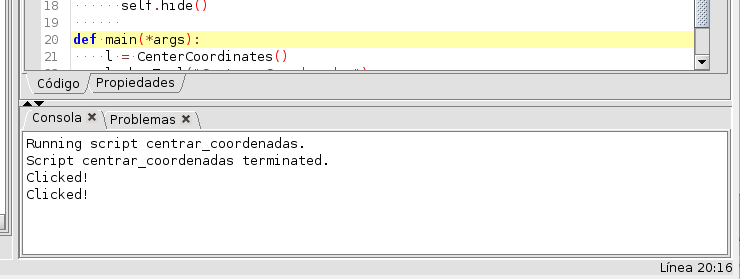
When we execute the script will appear an interface as below:
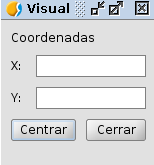
As happens when you press Center button, as programed with the method btnCenter_click, console display the word Clicked!.
If we press Close button the app will be close, by using the already implemented method class FormPanel, whitout need to be programed by us.
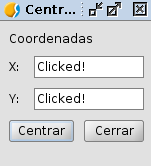
E.g. eaven we could modify the label text or other values :
self.txtX.setText(“Clicked!”) self.txtY.setText(“Clicked!”)
As we have seen, to acces our interface components, we will do through self. + component’s name.. E.g. we are going to implement that the “Center” button show us the coordinates of text box on console.
To do that we refer to the box text components txtX y txtY we have programed on the interface:
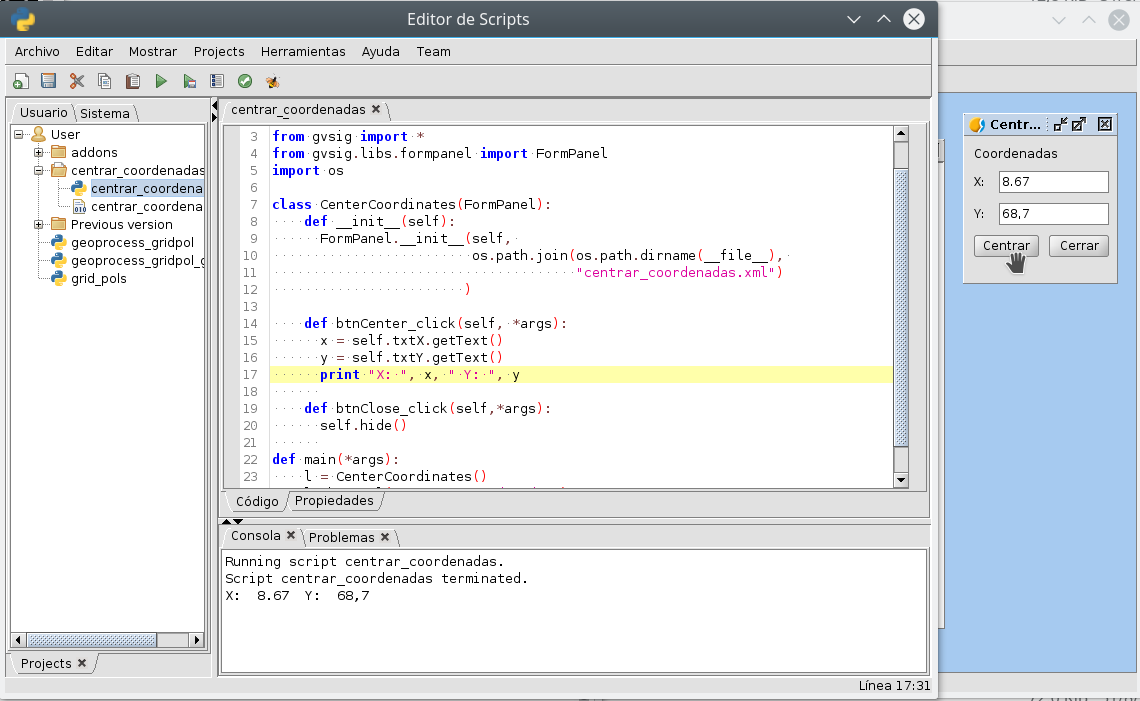
def btnCenter_click(self, *args):
    x = self.txtX.getText()
    y = self.txtY.getText()
    print "X: ", x, " Y: ", y
Here we see how it looks like:
Now, to fulfill the script propose, center coordinate view,we need just modify the method btnCenter_click as below:
# encoding: utf-8
from gvsig import * from gvsig import geom from gvsig.libs.formpanel import FormPanel import os
- class CenterCoordinates(FormPanel):
- def __init__(self):
- FormPanel.__init__(self,
- os.path.join(os.path.dirname(__file__),
“centrar_coordenadas.xml”)
)
- def btnCenter_click(self, *args):
x = float(self.txtX.getText()) y = float(self.txtY.getText()) point = geom.createPoint2D(x, y) currentView().centerView(point.getEnvelope())
- def btnClose_click(self,*args):
self.hide()
- def main(*args):
l = CenterCoordinates() l.showTool(“Centrar Coordenadas”) pass
With the following result:
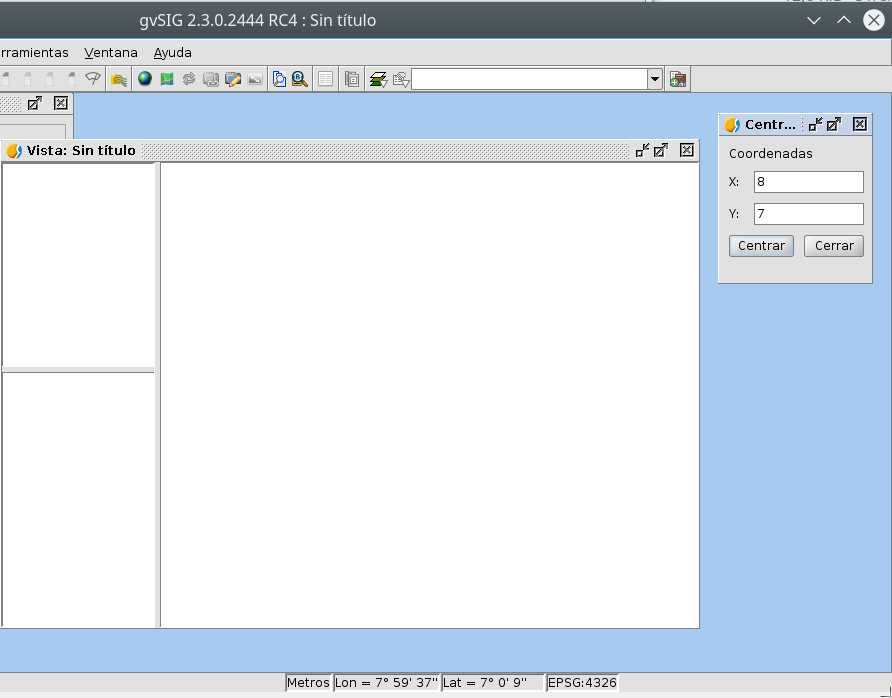
We see how the coordinates view we have indicated on text box has centered.
6.4. Deal with different components
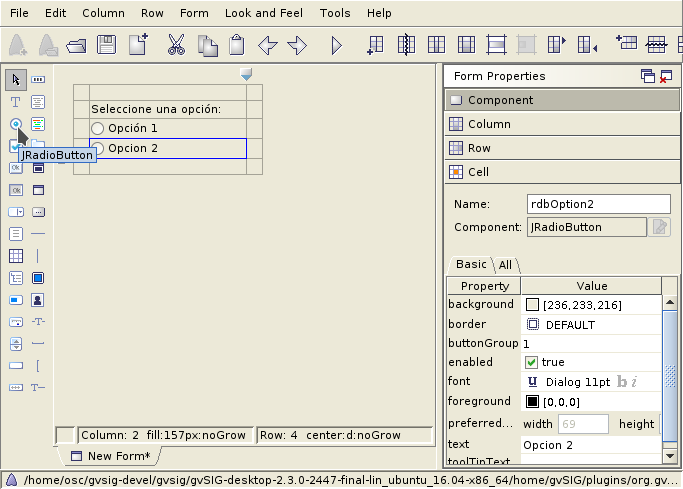
6.4.1. RadioButton’s Groups
A common function from the habitual interface is to create RadioButton’s group for the selection between many options. In general, this options come in group and only allow the selection between them. We must do this group by code as below.
After to generate the interface on the method __init__``from``FormPanel.__init__(..), we must to create a button’s group and add one by one those who belong to the group, e.g:
from javax.swing import ButtonGroup
...
self.btgAnswers = ButtonGroup()
self.btgAnswers.add(self.rdbOption1)
self.btgAnswers.add(self.rdbOption2)
Being rdbOption1 & rdbOption2, component’s type RadioButton from the interface.
6.5. Self registered events
We have commented that FormPanel handles link the components events with our script, but not all possible event of each interface element are implemented from FormPanel (but if you need any of them could be added or implement your own class) . Here are some of these events with reference to spinners, combobox, ec:
def btnCalcular_click(self, *args):
    self.txtField.setText("Clicked!")
    print "Clicked!"

def chb1_change(self, *args):
    print "Check box!"

def rb1_change(self, *args):
    print "Radio button!"

def cmb1_change(self, *args):
    print "Combobox!"

def sld1_focusGained(self, *args):
    print "Slider!", sld1.getValue()

def spn1_change(self, *args):
    print "Spinner!"

def btnClose_click(self,*args):
    self.hide()
