Document Actions
Description
Set pixel transparency and opacity
You can find information about the current raster layer through the option "Raster properties", which opens a dialog with several tabs. To access the pixel transparency and opacity options, go to the tab "Transparency".
The "Raster Properties" dialog can be accessed in two ways: by right-clicking on the raster layer in the TOC, or through the raster toolbar by selecting "Raster layer" on the left drop-down button and "Raster properties" on the drop-down button on the right. Make sure that the name of the raster layer for which you want to see information is displayed as current layer in the text box.

Raster properties icon
The transparency options that are set here will only be applied to the current view (i.e. they will not be applied permanently to the image). The transparency will be calculated and applied each time when you zoom on the view. The transparency settings can be saved in the current project, and when the project is opened again, the transparency will be applied on the layer. However, if the same image is opened in another project, it will be displayed normally without the transparency settings.
The upper part of the "Transparency" tab of the "Raster properties" dialog shows a sliding bar labelled "Opacity". After activating the sliding bar by ticking the check box, you can modify the opacity of the whole layer by moving the slider. (Opacity is the opposite of transparency: if you set the opacity to 0%, the layer will be 100% transparent.)
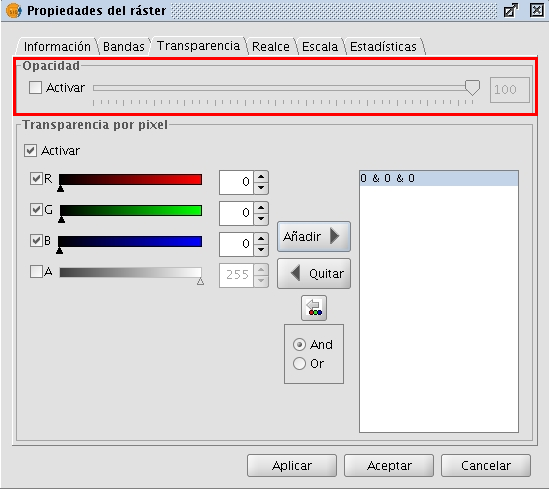
Set the transparency using the Opacity slider
The pixel transparency controls are located in the lower part of the "Transparency" tab. With these controls, you can apply transparency to pixels or a range of pixels depending on their RGB value. After activating the controls (by ticking the "Activate" check box) you can add specific RGB values to the list of elements through the "Add" button. Three values separated by the "&" or "|" symbol will be added as one item in the list; the three values correspond to the RGB value that will be set transparent. The values that are added are those that appear in the text boxes, the alpha value is optional. The information in these text boxes can be modified in three ways: typing the value directly by using the keyboard, moving the colour sliders on the left of the text boxes, or by clicking on the image in the view to select a specific colour value. This last option is activated with the button with the tooltip "Select RGB clicking on view". This will activate a crosshair cursor in the gvSIG view so that you can click on the image pixels and select the values for which you want to set the transparency.
If the line "255 & 0 & 0" is added to the list, this means that all pixels with the RGB values of 255 for red, 0 for green and 0 for blue (i.e. all pixels that are pure red) will be set transparent. The "&" symbol can be changed by the "And" and "Or" options. If "Or" is activated, the entries in the list will appear with the pipe symbol "|". The line "255 | 0 | 0" means that all pixels that have RGB values of 255 for red, or 0 for green, or 0 for blue will be set transparent. In this case many more pixels will be set transparent.
Set the transparency for specific pixel values


