Maps
The last document we will see is Maps or Layouts.
This is the one used for creating printouts and even though it is one of the most useful components (and sometimes complex) of gvSIG, it is very easy to explain.
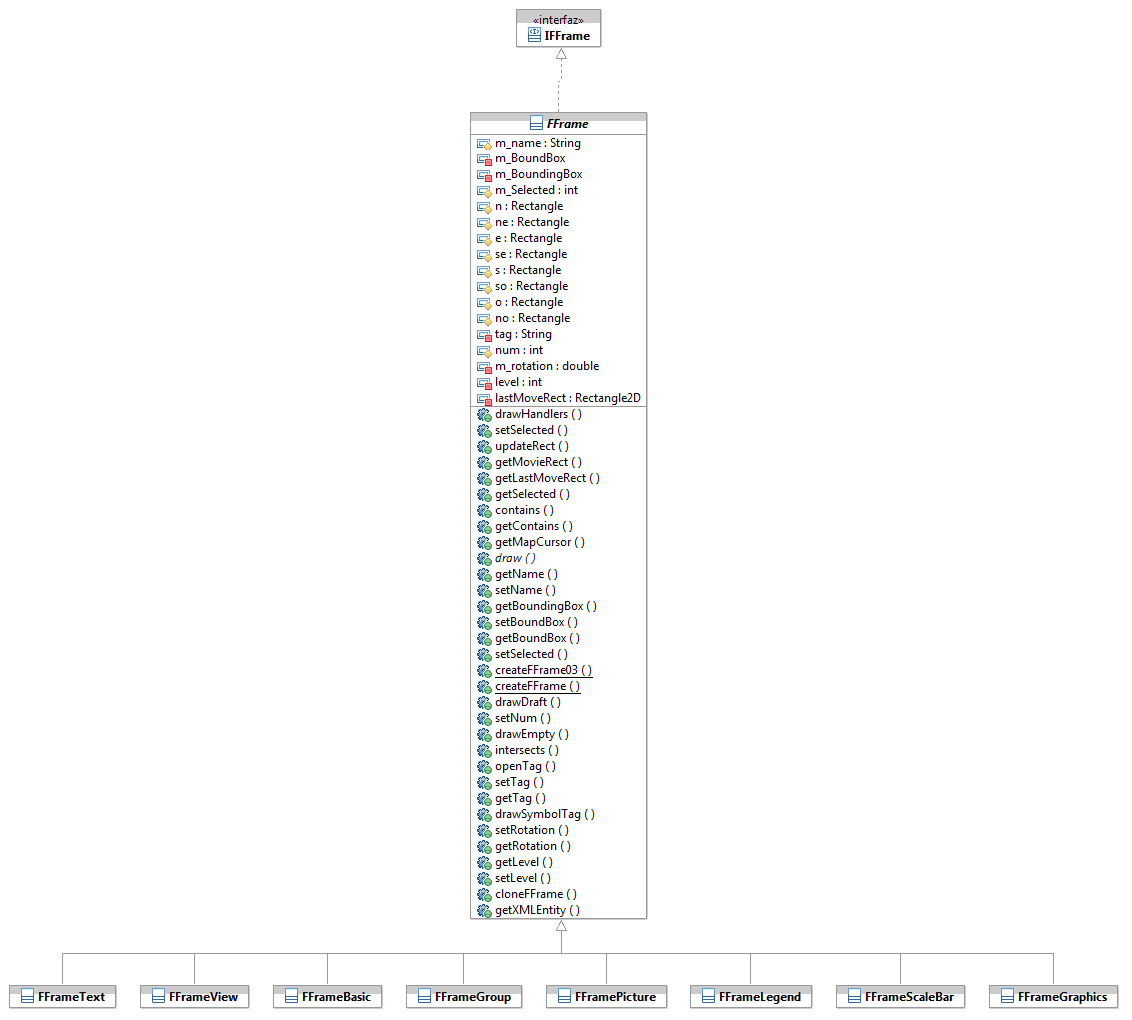
The Layout object (com.iver.cit.gvsig.gui.layout.Layout) is basically a canvas over which a hierarchic structure of FFrames is painted.
FFrames is an abstract class representing something that can be added to the Layout. It has defined limits (a rectangle) and each class inheriting from FFrame is responsible for drawing within that rectangle. This way the door is left open for the type of elements that can be added to a Layout

To see the entire hierarchy we can open the IFFrame interface (within the project.documents.fframes package)and select F4. We will find there all that can be added to the Layout:
- FFrameView: It is the most complex. It represents a View. There are few properties that can be defiend. (see user’s manual) such as if it is linked (or not) with the view that generated the object, the desired printing scale, etc. It also supports the functionality to change the zoom and the scale using tools from within the layout (very useful to frame correctly before printing).
- FFrameScaleBar: A scale bar (usually link to a FFrameView) with lots of customization options.
- FFrameLegend: The map legend, with the layers and their symbology. It can also be customized, to indicate which layers can be visible or invisible.
- FFramePicture: To add images.
- FFrameNorth: A particular case of FFramePicture to add north symbols (usually based on a SVG files and rendered by the Batik library).
- FFrameGraphics: Represents the vector elements available to be added to a map, such as boxes, break lines, circles, curves, etc.
- FFrameText: Text with support for font, colour, size.
All these graphic elements (and the ones to come) can be modified and the user can interact with them through dialog boxes available in the com.iver.cit.gvsig.project.documents.layout.fframes.gui.dialogs package.
Normally, it will not be necessary to touch any of these, but it is possible that during the creation of automated cards or series of layouts using code, we may have to retouch some of these elements (the typical thing is to change the FFrameView extent).
This is an example of code that iterates for the FFrame:
IWindow w= PluginServices.getMDIManager().getActiveWindow();
if (w== null) {
    return false;
}
if (w instanceof Layout) {
    Layout layout = (Layout) w;
            IFFrame[] fframes=layout.getFFrames();
    for (int i = 0; i < fframes.length; i++) {
                IFFrame f = fframes[i];
        if ((f.getTag() != null) && (layout.showIconTag())) {
                        f.drawSymbolTag(g2);
                    }
            }
 }
getTag() makes reference to a tag that can be added to all the instances of a FFrame. Its purpose is to be able to identify within a plan those FFrame that we would like to work with, for example, we can mark the fields of a form with the table and field that we could use to substitute the text in each printing of a series of cards.


