Document Actions
Introduction
The first thing we will look at is how gvSIG is organized internally.
One of the requirements for gvSIG was to be modular, that is, it should allowed for functionality improvements without having to modify the original code.
That is the reason we start from a nearly empty application that basically give us a windows manager and a load of plugins based on configuration files. The idea is exactly the same as the one used by Eclipse. Our plugings are the equivalent to the bundles from Eclipse, and Andami (our framework) is the equivalent of the RCP from Eclipse.
In a gvSIG installation, the andami.jar contains the base application, and the class that is executed is Launcher.java. Then we find the “extensions” directory, and inside that directory there are as many subdirectories as plugins installed in Andami.
Those subdirectories have the following structure:
A file config.xml where all the dependencies for that plugin are specified, the menus, toolbars and buttons that are available for the application and the implemented classes defined by the functionalities of the plugin.
A file .jar with the classes that make up the plugin (it can be with the file config.xml, or in some directory, e.g. lib).
Other libraries used by the plugin will be next to the .jar file mentioned before, usually in lib.
Other files used by the plugin (button icons and/or any other file to be used by that plugin.
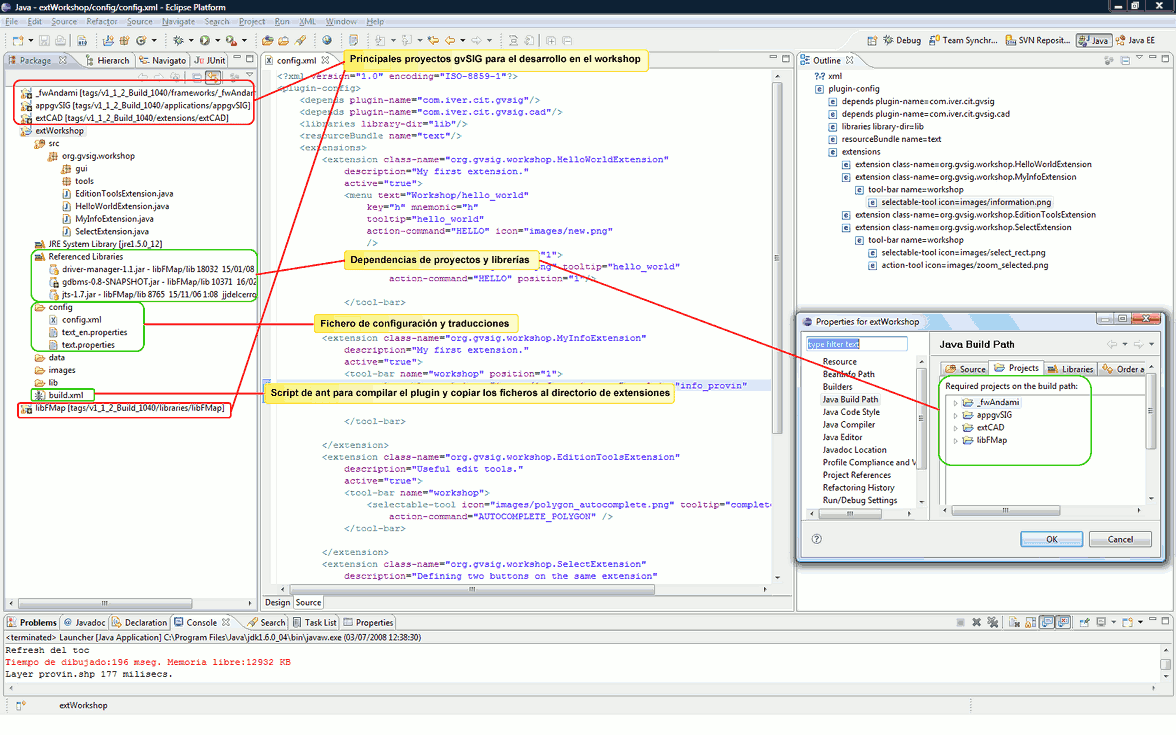
The format for the config.xml file can be found in _fwAndami/schemas/plugin-config.xsd. Open the file with a text editor and read the comments. For example:
<!--
action-tool => Button which fires the execution of this extension

action-command Text to identify different action-tools inside a plugin
text Button's text.
name Button name (to retrive it)
icon Tool icon
last If true, a separator is added.
tooltip Tooltip
enable-text Text that describes the necessary conditions to enable a tool
position The position inside the toolbar
-->
<xs:element name="action-tool">
<xs:complexType>
<xs:attribute name="text" type="xs:string" use="optional" />
<xs:attribute name="name" type="xs:string" use="optional" />
<xs:attribute name="action-command" type="xs:string" use="optional" />
<xs:attribute name="icon" type="xs:string" use="required" />
<xs:attribute name="last" type="xs:boolean" use="optional" />
<xs:attribute name="tooltip" type="xs:string" use="optional" />
<xs:attribute name="enable-text" type="xs:string" use="optional" />
<xs:attribute name="position" type="xs:int" use="optional" />
</xs:complexType>
</xs:element>
Here it is defined how to specify a button “action-tool” type. An example of usage:
<extension class-name="com.iver.cit.gvsig.AddLayer"
description="Extension to open different layers."
active="true"
priority="20">
<menu text="View/Add_Layer" key="o" icon="images/addlayer.png"/>
<tool-bar name="View" position="2">
<action-tool icon="images/addlayer.png" tooltip="Add_Layer" position="1"/>
</tool-bar>
</extension>
We will see that the class containing the code to be executed when we click on the addlayer button it is called com.iver.cit.gvsig.AddLayer.java.
The toolbar containing that button is called “View”, and the button defines its icon (addlayer.png, inside the images directory), its position within the toolbar (it will be the first button) and the tooltip. The chain Add_Layer can be found in the .properties files. It is the code used for translating the text to the corresponding language. The remainder of the parameters are optional, thus they have not been defined.
The most important of all is that the config.xml file of an extension provides an excellent guide to understand what code we need to look at in order to know what a button or a menu option will do exactly when executes. The parameter class-name for the extension is the key, the class to look up and that will help us for copying its code whenever we want to create an extension similar to one that already exist.
Now we know how gvSIG is organised internally. The next step is to know how all the directories are generated, how the extensions are compiled, which extensions we can work with and what parameters gvSIG needs for star up. We will cover all those points next.


