gvSIG-Desktop 1.12. Manual de usuario
If you have previously used the connection manager in a previous gvSIG session, the connections will have been preserved. Otherwise, it will be empty:
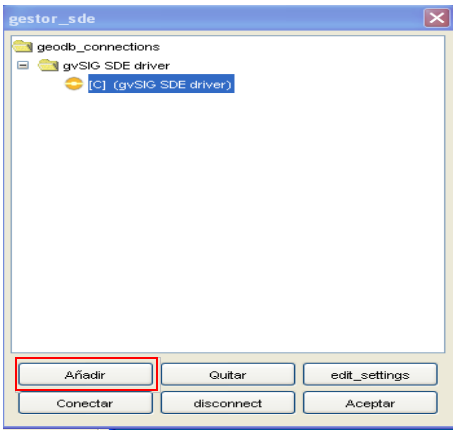
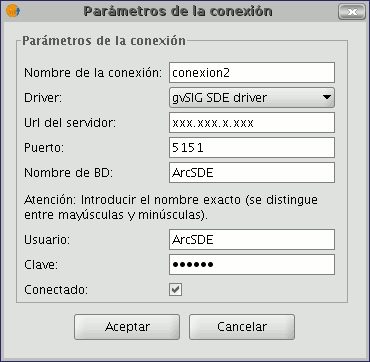
Click "add" and a window that allows you to enter new connection parameters will show up. Fill the data fields and click "OK". Note: In the drop-down selections of “Driver” select the one that corresponds to "gvSIG SDE driver", as shown in the image.
Once the connection is validated, it brings back the "connection manager" with the new database in the list. If in the connection settings window the "connected" box is left checked, the connection will remain open. Open connections are marked "[C]" before its name.
If you want to disconnect the connection click on "disconnect" at the bottom of the manager. The connection will stop at the time, but the parameters will remain recorded for future connections. If you want to open a connection that is already included in the list for having been previously used, you must select it and click "Connect". It will ask for the password again in a window like in the following figure represents and the connection will be open.
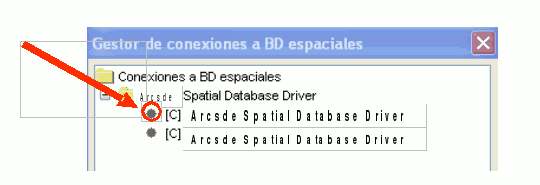
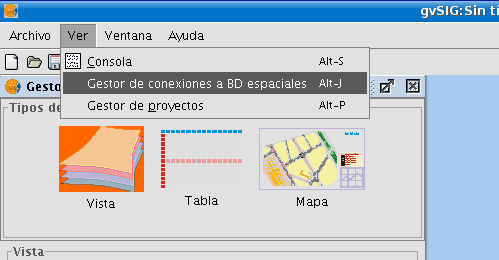
Choose the menu "View / Spatial BD connection manager" to open the dialogue that lets you add, remove, connect and disconnect connections to different types of databases with geographic information:
Once we have established the connection to the server, we can begin to query information from it.
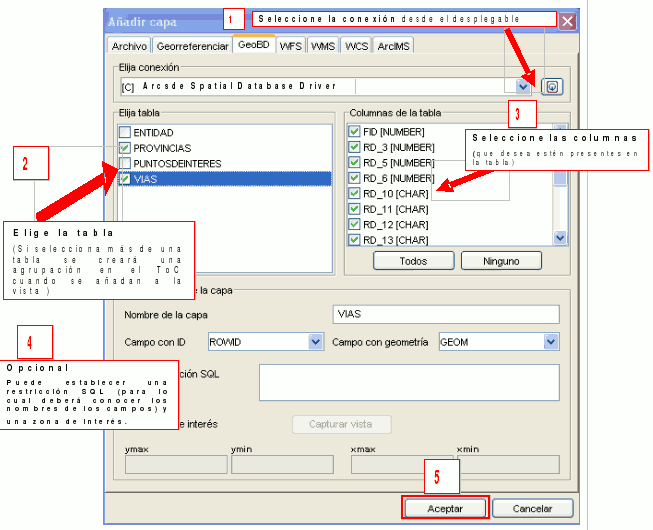
For this we will open a view and press the button "Add layer".

Then select the GeoBD tab.
. In the dropdown list you can select your connection. The button to the right side of the box can take you directly to the connection settings window, in case you want to add a connection in some other time without having to go through the connection manager.
. Once the connection is established you will see a list of the available information that can be added to gvSIG.
. From this window you can query or create filters (SQL restrictions) before adding the information.
. Once you select the information you want, click "OK" and it will upload into the view.
