gvSIG-Desktop 1.12. Manual de usuario
Field Calculator
Introduction
gvSIG’s field calculator allows you to perform different types of calculations on the fields of a table (for example calculate areas, perimeters, convert the data in a field from degrees to radians, etc).
Accessing gvSIG's field calculator
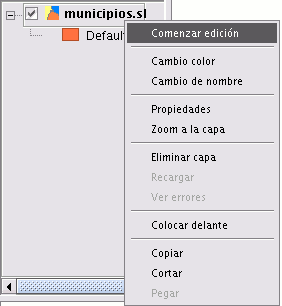
To access the field calculator, you must first start an editing session in gvSIG. If you wish to activate the edition of a layer loaded in a view, go to the layer’s contextual menu and select “Start edition”.
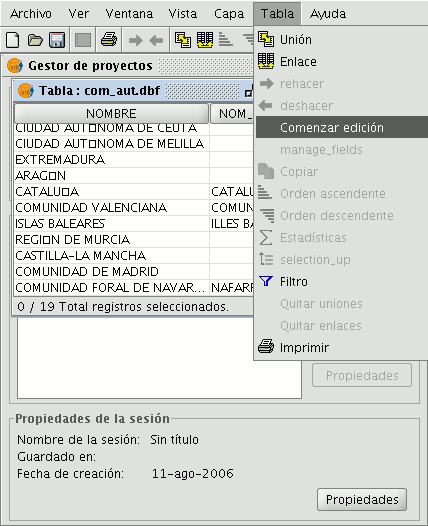
If you wish to edit a recently-loaded table, go to the “Table” menu and select “Start edition”.
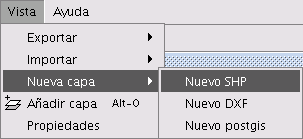
If you decide to use the field calculator on a “New layer” (for example New shp) which you are going to create (remember that to access this option you must go to the “View” menu and select the “New layer” option), the layer will automatically appear in editing mode when inserted in the view.
Once you have started an editing session, activate the table of attributes on which the operations are going to be performed and select one of the fields (by clicking on the field heading). The following button will then be activated in the tool bar:

This will allow you to access the field calculator.
NB. The first time you open the field calculator in a new gvSIG session, a warning window appears to inform you that the calculator is “Loading operators”. Once this process has finished, the window which allows you to perform operations with the various fields appears.
Introduction example
“Field calculator” Let us look at a simple example to explain how the field calculator works.
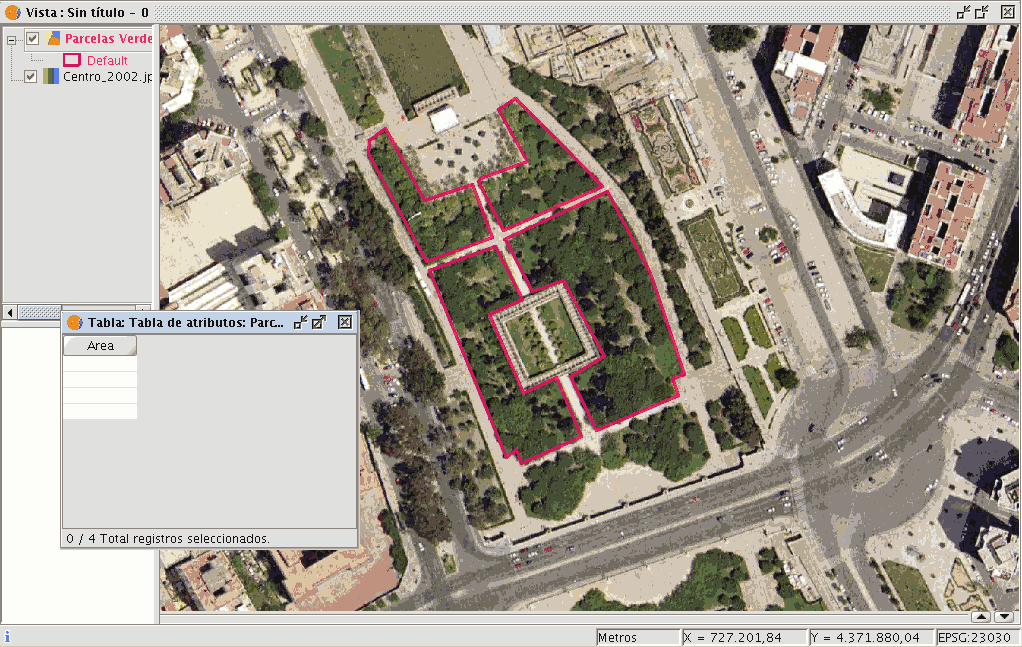
In order to work out the area of a series of plots in a layer we have created:
First, open a gvSIG view and load an orthophoto which will be used as a base to determine the location of the plots. Next, select the tool in order to create a new shp file (View/New layer/SHP).
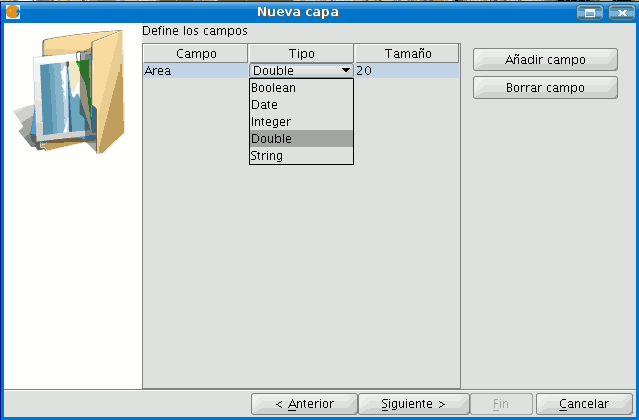
Select a “Polygon” type layer, click on the “Next” option and then create a “Double” type field called “Area”, leaving the default value at 20.
Draw four plots on the orthophoto using the “Insert polyline” tool selected from the tool bar. The image below shows that a record for each of the plots has been created in the table.
Select the field from the table and activate the field calculator.

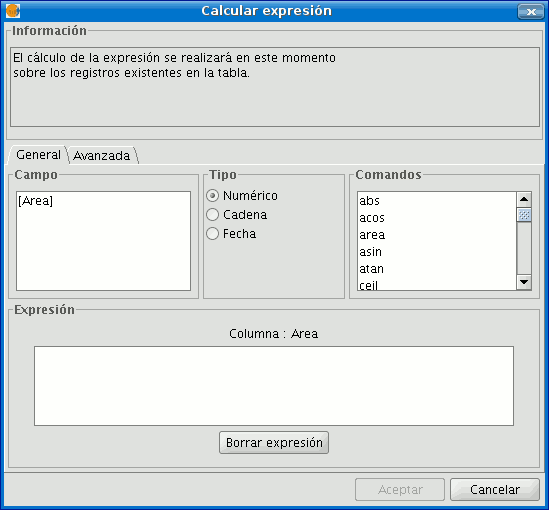
The following information appears in the “General” tab:

“Field”. This contains the various different fields which comprise the table being worked on.
“Type” of field selected. Access to different commands depends on the type of field.
“Commands” which can be used in the calculations.
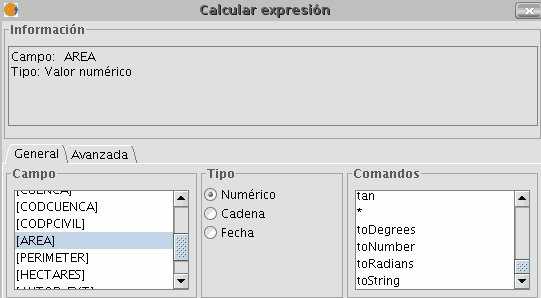
The “Information” section shows that:
If the “area” command has been selected in the “General” tab, a brief description will be displayed in the information window.

If the “area” command has been selected in the “General” tab, the information window returns a message with information on the field type (remember that when designing the “area” shape, a Double type numeric field was created in which the area will be calculated).

The “Expression" area displays the name of the column on which the calculation is being performed and a text box for the calculation sentence to be used.

In this case, the sentence included in the expression section is simple (no parameters are required as they are in other expressions which shall be explained later on).
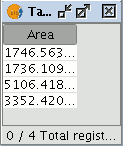
To sum up and conclude this example, once the “area” command has been selected, click on “Ok” and the field created in the table will automatically be filled with the area values of each of the polygons drawn.
Description of the 'Field Calculator'
Introduction

The field calculator window has three different sections.
Information
The Information section provides information about the type of field and the commands selected in the “General” tab.
The following information can be found in this section:
- “Operator" = This indicates the command selected and the expression which allows it to be executed.

Example: In this case the command we wish to use is “log”, which allows us to calculate the logarithm of a field with a numerical value.

The “log (Parameter)” operator indicates that, for example, in order to obtain the logarithm of a field which contains the area data of a plot shp, the word “Parameter” must be replaced by the field we wish to obtain the logarithm of. As a result, the expression will be as follows: log([AREA])

- "Parameter" = This can be one of three different field types which must be entered in the expression box in order to perform the calculation.
- Numerical value: a String, Double or integer type field must be entered.
- String value: A String type field must be entered.
- Date value: A date type field must be entered.
NB. If a table field is selected in the “Field” section of the field calculator, the information window indicates what type of data it is.
NB. In order to input parameters into the “Expression” text box, either double click on the name of the field from the list of fields in the General tab or type in the name of the field, in which case the String expressions input must be placed in inverted commas.
- "Return" = This indicates the type of data obtained as a result of the calculations.
Numerical Value = The result must be String, Double or integer type field data.
NB. If a String field type has been selected, it should be noted that this field type uses string values. If we add two String fields to another String field, the final result is a string and not the result of the operation (for example: 2+2 = 22, not 4).
Boolean Value = A Boolean value returns a true/false answer to a question. If the result of the question is in a numerical field, it would therefore be either “1/0” depending on whether the reply was true or false. Let us look at an example:
We wish to know if there are records in a field which are the same as those in another field. The command which allows us to find this out “==”

If we type the following sentence: [integer] == [double] (double and integer being the names of two fields, each with numerical values), the response according to the type of target field (Boolean or String) can be seen in the image below:

- Date Value: The result must be in a Date type field.
NB. If a new layer is created in a gvSIG view (View menu / New layer), the wizard for this action allows you to specify the “Type of field” on which calculations are going to be performed.

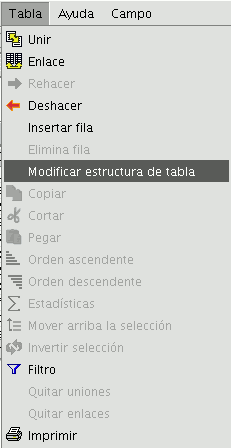
If you are working with a layer and wish to know the field type, simply start a layer editing session, go to the “Table” menu and select “Manage fields”.
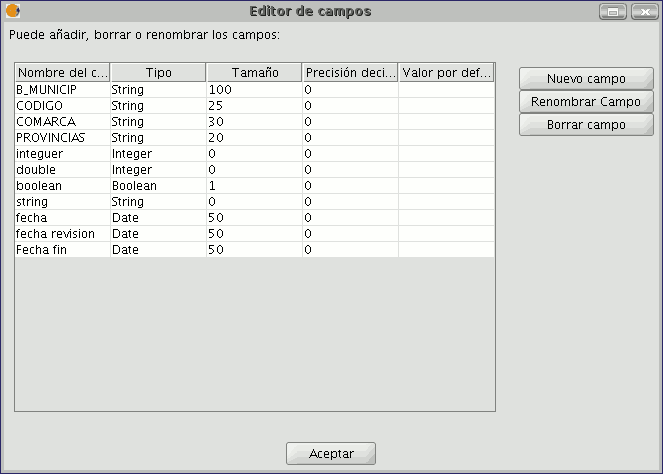
This opens a window called the “Field manager”, which allows the fields of a table to be created, renamed or deleted. It can also be used to confirm the field type.
General / Advanced Tabs
- General: This provides information about:
- "Fields": The text box shows all the fields of the table being worked on.
- "Type": Access to commands depends on which check box is activated.
- "Commands": These are the operators which allow expressions to be constructed to perform the calculations required.
- Advanced: A search box may be opened to look for an expression saved in a file.

Once the file has been selected, click on the “Evaluate” button to find out whether the expression is correct or not.
NB. The expressions must be written in Python programming language.
'Expression' Section
The name of the field the results of the calculations of the expressions entered in the text box appear in is next to the “Column” text.
NB. The expressions are only calculated on the records selected in the table (if no records have been selected, the calculation is performed on all the records in the selected field).
Introductory example: 'Field Calculator'
“Field calculator” Let us look at a simple example to explain how the field calculator works.
In order to work out the area of a series of plots in a layer we have created:
First, open a gvSIG view and load an orthophoto which will be used as a base to determine the location of the plots. Next, select the tool in order to create a new shp file (View/New layer/SHP).
Select a “Polygon” type layer, click on the “Next” option and then create a “Double” type field called “Area”, leaving the default value at 20.

Draw four plots on the orthophoto using the “Insert polyline” tool selected from the tool bar. The image below shows that a record for each of the plots has been created in the table.

Select the field from the table and activate the field calculator.


The following information appears in the “General” tab:

“Field”. This contains the various different fields which comprise the table being worked on.
“Type” of field selected. Access to different commands depends on the type of field.
“Commands” which can be used in the calculations.
The “Information” section shows that:
If the “area” command has been selected in the “General” tab, a brief description will be displayed in the information window.

If the “area” command has been selected in the “General” tab, the information window returns a message with information on the field type (remember that when designing the “area” shape, a Double type numeric field was created in which the area will be calculated).

The “Expression" area displays the name of the column on which the calculation is being performed and a text box for the calculation sentence to be used.

In this case, the sentence included in the expression section is simple (no parameters are required as they are in other expressions which shall be explained later on).
To sum up and conclude this example, once the “area” command has been selected, click on “Ok” and the field created in the table will automatically be filled with the area values of each of the polygons drawn.

Add consecutive numbers
Introduction
This functionality makes it easy to populate a field in a table with consecutive numbers by means of a mathematical function (REC) in the field calculator.
Enter row numbers in a field
This new functionality has been introduced to facilitate the task of filling a field in a table with consecutive numbers by means of a mathematical function in the field calculator.
This function is typically used for the "ID" field of a layer's geometries. To access it you need to activate edit mode for the layer and then open the table. Select the field (of type Integer) to which you want to add consecutive numbers and click on the field calculator.

Calculator button
Select the numeric type option and then double-click the "rec" command, as shown in the figure below.

Rec function (consecutive numbering)
Once the process is complete the selected field in the table will be filled with consecutive numbers, starting with the number "0". Finish editing and save changes if desired.


